|
|
|
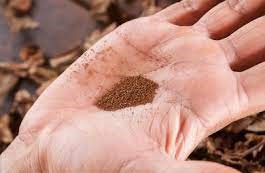
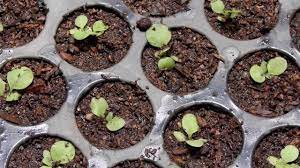
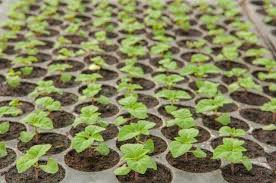
How to grow tobacco Tobacco seeds are incredibly tiny that grow into large hardy plants. Tobacco will grow pretty much where any other agricultural crop will grow, although, tobacco grows better in soils which drain well. Poorly drained soils could result in poor growth and even death of the plants; however, tobacco can be grown on poorly-drained soils if the rows or hills are bedded and ditches or furrows are used to remove excess water. An important thing to note is that tobacco will be affected by the soil in which it is grown; lighter soils will produce lighter coloured tobacco while darker soils will produce darker coloured tobacco. For best results, grow tobacco in a climate that is dry and warm. Tobacco requires a frost-free period of about 3 to 4 months between transplant and harvest. Soil PH should be about 5.8 for best growth results. For centuries, farmers and gardeners have cultivated home-grown tobacco for personal use. Although today the vast majority of tobacco is grown and cured by large corporations, it is possible to grow your own with a bit of know-how and a lot of patience. If you have the ability to grow a vegetable garden, then you have the ability to grow and tobacco plant! Follow the steps below to grow your own tobacco. Producing transplants Before planting outside, seeds should be started indoors about 4 to 6 weeks before the last frost. Ideally the seedlings will be started in pots or other containers allowing for ease of removal to transplant into larger pots then eventually into garden. If wanting to keep plant in a pot to move outside, choose an appropriate sized pot to allow for the maximum growth of the plant. Sprinkle seeds onto the surface of a moist and sterile seed starting mix, then firm the soil surface to ensure good seed to soil contact. The seeds need light to germinate so do not cover the seeds as this will slow down and even prevent germination. As the seeds are tiny be sure not to sow them too thickly, allow adequate spacing between seeds to avoid overcrowding. The seed starting mix should consist of compost and other nutrients such as potassium and phosphorus, which promote healthy seed growth. Tobacco seeds require warm temperatures ranging from 75 to 80 degrees Fahrenheit to properly germinate. Seeds should begin to germinate in 7 to 10 days, but some varieties may take up to 2 weeks. Water the soil frequently to keep it moist, but avoid excessive water. It is critically important to never let them dry out as they will die immediately if they get dry. Be careful when watering because the force of the water can uproot the freshly emerging fragile seedlings. Whenever possible, water the seedlings from the bottom and irrigate with a very fine spray. Small amounts of fertilizer will be needed and the fertilizer should contain little to no chlorine and nitrogen should be in the nitrate form; fertilizers suitable for tomatoes and peppers work well for tobacco. When seedlings begin to show their first leaves, usually after about 3 weeks, they can be transplanted into bigger containers allowing them to grow a strong and healthy root system. Your seedlings will be the right size for transplanting if you can easily pinch them between your thumb and index finger; if they are still too small, allow the germination process to continue before attempting to transplant again. As with most plants started indoors, bare-rooted plants can go into transplant shock with most of its leaves turning yellow and wilting. After about a week the plants will begin to flourish again. To avoid transplant shock altogether, start your seedlings in a pot large enough so that you will only need to complete one transplantation directly into your garden.
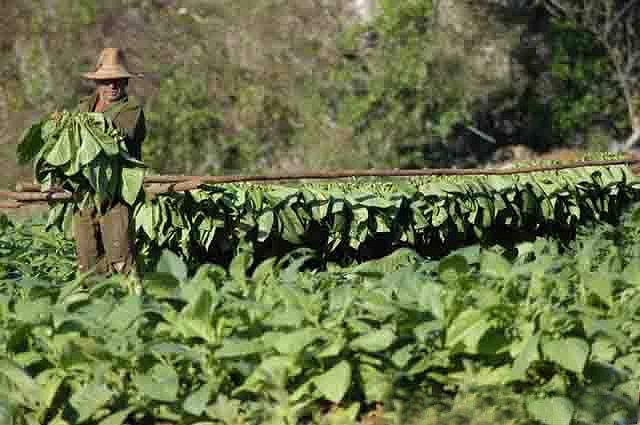
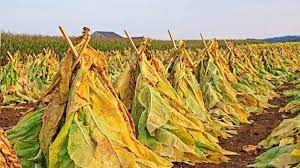
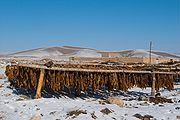
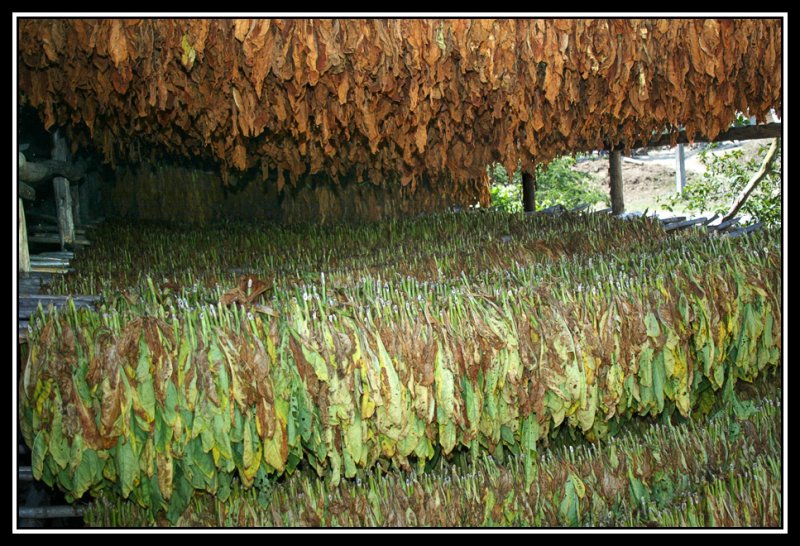
Transplanting Seedlings are ready to be transplanted into your garden when the plant's shoots are about 6 to 8 inches in height and there is no further danger of freezing temperatures. Transplanting tobacco is very similar to transplanting other garden plants. When choosing the plot in your garden to grow tobacco, be sure the area is constantly exposed to the sun, well-drained, and tilled. Transplant the tobacco into your garden spacing the plants at least 2 to 3 feet apart in a row and space the rows 3 to 4 feet from each other. Tobacco plants are self-pollinating, which means they have the ability to fertilize their own flowers. This needs to be noted when purchasing and planting different varieties, do not plant the different varieties close to one another. Freshly transplanted plants are very fragile and will need a few days to adapt to their new environment. Continue to water these plants daily until the leaves visually regain their strength and then water the plants weekly or as needed during the season. Keep the plants well watered without making the soil soggy. Caring for your plants As in the producing transplants stage, small amounts of fertilizer will be needed periodically to maintain the growth of these plants. The fertilizer should contain little to no chlorine and nitrogen should be in the nitrate form; fertilizers suitable for tomatoes and peppers work well for tobacco. The best approach to fertilizing tobacco in your garden would be to apply fertilizer as needed to keep the plants growing well with a good green colour; do not over fertilize. If adequately fertilized up to the time of flowering, there should be no need to add more fertilizer after the flowers begin to form. Some gardeners grow tobacco plants for ornamental purposes, which includes the flowers; while others grow these for seed production. If growing for seed production, the flower heads are covered with a bag before the flowers open in order to maintain purity of the variety. If you are growing these for cured tobacco you will need to top the tobacco plant as soon as it begins to flower. Plants are topped at a height of 16 to 18 marketable leaves, generally in late July. To top the plant, remove the terminal bud, or flower clusters, by breaking or cutting it off, preferably before any flowers open. This will allow the upper leaves of your plant to get larger and thicker than they would in a untopped condition. Soon after the top is removed, auxiliary buds or suckers will develop at the base of each leaf - remove these by hand. The auxiliary buds or suckers should be removed when they exceed about an inch in length and it may be necessary to remove them several times throughout the growing season. Your plant should have one large leaf at each leaf base. Tobacco roots grow quickly and the root structure is quite large, with thousands of small hair-like feeder roots that grow close to the soil's surface. For weed control, hoe gently or lightly scrape weeds as penetrating the soil too deep can damage the roots. For pest control, avoid the use of chemical insecticides as well as soapy water solutions because the plant will absorb these into the leaves which will affect the taste of the tobacco. It is recommended to to just wash your plants periodically with the garden hose and remove by hand any leaf-grinder insects, such as caterpillars. Note: tobacco plants are very heavy feeders, meaning they will deplete the nutrients in the soil in about 2 years. To counteract this, employ a 2 year rotation in your growing space by planting in a different location and waiting at least 1 year before transferring it back to its original location. Harvesting your plants Your plants should be ready to harvest about 3 months after planting, usually sometime in September. You will know that your plants are ready for harvesting when the leaves are beginning to yellow. Harvesting can be accomplished by either removing the leaves from the stalk directly (cropping) in the garden or by cutting the stalk off at ground level. If removing the leaves from the stalk in the garden, there should be 4 or 5 harvests at intervals of 1 to 2 weeks, starting with the lower leaves. The first harvest should start soon after topping and when the leaves show a slight yellowing. You will need to keep the leaves intact because they will be hanged during the curing process. If cutting the stalk off at ground level, this can be done at the end of the season and keep the leaves on the plant while hanging as they will continue to draw nutrients from the stalk during the curing process. Harvesting the whole plant is recommended for the home gardener as the leaves only method does require a special curing process. Curing your plants Once you have harvested your plants, they can be hung to begin the curing process. Curing is necessary because it prepares the leaves for consumption; the process produces various compounds in the leaf which give cured tobacco its aromatic flavour. Curing also contributes to the tobacco's smoothness when consumed. Raw tobacco leaves must be cured before they can be consumed. There are many different methods of curing tobacco - sun cured, air cured, heat or flue cured, smoke cured. Many commercial growers use heat, flue or smoke to cure their tobacco in specialized equipment that keeps constant temperature and humidity during the process. For the home gardener it is recommended to sun-cure by exposing the leaves to the sun for a week or more, weather permitting, to remove most of their moisture before switching to air-curing as this is a natural curing method. Hang the stalks, with leaves attached intact, in an area out of inclement weather and direct sunlight. A building that can be opened and closed as needed to control the relative humidity and drying rate is desirable. The rafters of a garage or barn with the warm days and cool nights of early Fall are perfect conditions for curing tobacco leaves. Ensure there is adequate space between the stalks to allow for satisfactory drying of the leaves. Temperatures for air curing may range from 60 to 65 degrees Fahrenheit up to 90 to 95 degrees Fahrenheit, and the relative humidity of the air should be about 65%-70%. There are some dark leaf varieties that cure from green to brown while other varieties cure from green to yellow to brown. High temperature drying cures the leaves a golden colour whereas plants cured during the natural process cure to brown colour. Proper curing should take several weeks in order to produce good quality, typically between 8 to 13 weeks. Tobacco that cures too fast will be green and not have good aroma and flavour, while mold or rot may develop if curing is too slow. Be sure to monitor your tobacco leaves closely for these signs and adjust your temperature or humidity accordingly.
Aging your tobacco After the tobacco leaves have cured, you will age your tobacco in conditions similar to the curing process. Aging will not occur if the temperature and moisture content is not controlled. If the tobacco is too dry, it will not age, if it is too moist, it will rot. Unfortunately, the proper temperature and humidity vary widely and will require some experimentation on your part. Monitor your leaves closely during the aging process to ensure that they remain moist, yet rot free. Aging is not an exact science and will require adjustments when necessary. Commercial tobacco is typically aged for a year or more, fermented and processed in many different ways. Most of these methods are proprietary and highly guarded secrets of the cigar masters and cigarette makers. Aging your own tobacco can take 5 to 6 years for optimum flavour. Aging will always improve a tobacco, so the longer it ages the better it will taste. Aging your tobacco leaves is optional, but know that un-aged tobacco is often harsh, unpleasant, lacks good aromatics and flavour, and will likely taste like you are smoking leaves from your yard! For those of you that wish to have a shorter aging period, we recommend building your own tobacco curing kiln. A kiln is a small insulated container with heat source that helps to simulate the aging. The cured leaves are placed in the kiln with the lid shut; heat and humidity are carefully controlled, and the kiln is left on for 24 hours a day for at least 4 to 6 weeks. Click here to be re-directed to the free plans for building your own tobacco curing kiln. Once the aging process has been completed, to your satisfaction, the full leaves can be used to roll your own cigars or you can cut and shred the aged leaves and blend with other varieties to make your cigarette, pipe or chewing tobaccos. By blending different varieties of tobacco you can create your own unique product and will be able to achieve a flavour and level of satisfaction that you've always been looking for. For centuries, pipe smokers have been blending various tobaccos to suit a particular mood or simply to vary a flavour that has grown tedious. For more information on blending tobacco, click here to be re-directed to some excellent video tutorials.
|
|
|